RESTful JPA Repositories with Spring Boot
In this post we will see how to create restful endpoints from JPA Repositories in a Spring Boot application.
Introduction
In the HATEOAS implementation tutorial, we pretty much save and retrieve data from the database. But there is too much boilerplate code for just managing the data(Controller methods). In situations like these, Spring Data REST comes to the rescue. It provides a RESTful resource mechanism on top of the existing Spring Data repositories. This way we can skip writing boilerplate controllers and expose JPA repositories over HTTP with few annotations.
Setting up RESTful JPA Repositories
Spring DATA is an umbrella project that consists of many modules that deal with various databases. At the time of writing, there are 17 modules under spring-data.
And out of all these, Spring Data REST supports the following modules officially.
- JPA
- MongoDB
- Neo4j
- GemFire
- Cassandra
As usual, to enable RESTFul JPA for a spring boot project, you need to add the below starter to your project.
  <dependency>
    <groupId>org.springframework.boot</groupId>
    <artifactId>spring-boot-starter-data-rest</artifactId>
  </dependency>Code language: HTML, XML (xml)
To demonstrate how simple this is, I picked up the example from HATEOAS implementation tutorial and removed all the Controller classes. By starting the application, you will see the following response when opening http://localhost:8080/.
For the sake of simplicity and continuity from my previous posts, we are using
spring-boot-starter-data-JPAas thespring-datamodule. But the examples would pretty much work for anyspring-boot-starter-data*from the above list of officially supported data modules.
{
  "_links" : {
    "carts" : {
      "href" : "http://localhost:8080/carts{?page,size,sort}",
      "templated" : true
    },
    "orderHeaders" : {
      "href" : "http://localhost:8080/orderHeaders{?page,size,sort}",
      "templated" : true
    },
    "items" : {
      "href" : "http://localhost:8080/items{?page,size,sort}",
      "templated" : true
    },
    "cartItems" : {
      "href" : "http://localhost:8080/cartItems{?page,size,sort}",
      "templated" : true
    },
    "profile" : {
      "href" : "http://localhost:8080/profile"
    }
  }
}Code language: JSON / JSON with Comments (json)
If you look closely, all of these endpoints represent each @Repository that we have created for Cart, OrderHeader, Item and CartItem. This behaviour is commendable because we never wrote a single line of code. Let’s dig a bit more. There is a profile endpoint that gives information about the operations that can be done on specific JPA @Repository
{
  "_links" : {
    "self" : {
      "href" : "http://localhost:8080/profile"
    },
    "carts" : {
      "href" : "http://localhost:8080/profile/carts"
    },
    "orderHeaders" : {
      "href" : "http://localhost:8080/profile/orderHeaders"
    },
    "items" : {
      "href" : "http://localhost:8080/profile/items"
    },
    "cartItems" : {
      "href" : "http://localhost:8080/profile/cartItems"
    }
  }
}Code language: JSON / JSON with Comments (json)
Opening a specific JPA repository profile gives information about those repository entities and the operations allowed to be performed from them. To understand this output, the /carts repository endpoint will provide a cart resource with the JSON cart-representation that contains fields status and cartItems.
Here status field is an enum with possible values NEW and SUBMITTED. The cartItems is a list that has its endpoint described by http://localhost:8080/profile/cartItems.
{
  "alps" : {
    "version" : "1.0",
    "descriptor" : [ {
      "id" : "cart-representation",
      "href" : "http://localhost:8080/profile/carts",
      "descriptor" : [ {
        "name" : "status",
        "type" : "SEMANTIC",
        "doc" : {
          "format" : "TEXT",
          "value" : "NEW, SUBMITTED"
        }
      }, {
        "name" : "cartItems",
        "type" : "SAFE",
        "rt" : "http://localhost:8080/profile/cartItems#cartItem-representation"
      } ]
    }, {
      "id" : "create-carts",
      "name" : "carts",
      "type" : "UNSAFE",
      "descriptor" : [ ],
      "rt" : "#cart-representation"
    }, {
      "id" : "get-carts",
      "name" : "carts",
      "type" : "SAFE",
      "descriptor" : [ {
        "name" : "page",
        "type" : "SEMANTIC",
        "doc" : {
          "format" : "TEXT",
          "value": "The page to return."
        }
      }, {
        "name" : "size",
        "type" : "SEMANTIC",
        "doc" : {
          "format" : "TEXT",
          "value": "The size of the page to return."
        }
      }, {
        "name" : "sort",
        "type" : "SEMANTIC",
        "doc" : {
          "format" : "TEXT",
          "value": "The sorting criteria to use to calculate the content of the page."
        }
      } ],
      "rt" : "#cart-representation"
    }, {
      "id" : "delete-cart",
      "name" : "cart",
      "type" : "IDEMPOTENT",
      "descriptor" : [ ],
      "rt" : "#cart-representation"
    }, {
      "id" : "patch-cart",
      "name" : "cart",
      "type" : "UNSAFE",
      "descriptor" : [ ],
      "rt" : "#cart-representation"
    }, {
      "id" : "get-cart",
      "name" : "cart",
      "type" : "SAFE",
      "descriptor" : [ ],
      "rt" : "#cart-representation"
    }, {
      "id" : "update-cart",
      "name" : "cart",
      "type" : "IDEMPOTENT",
      "descriptor" : [ ],
      "rt" : "#cart-representation"
    } ]
  }
}Code language: JSON / JSON with Comments (json)
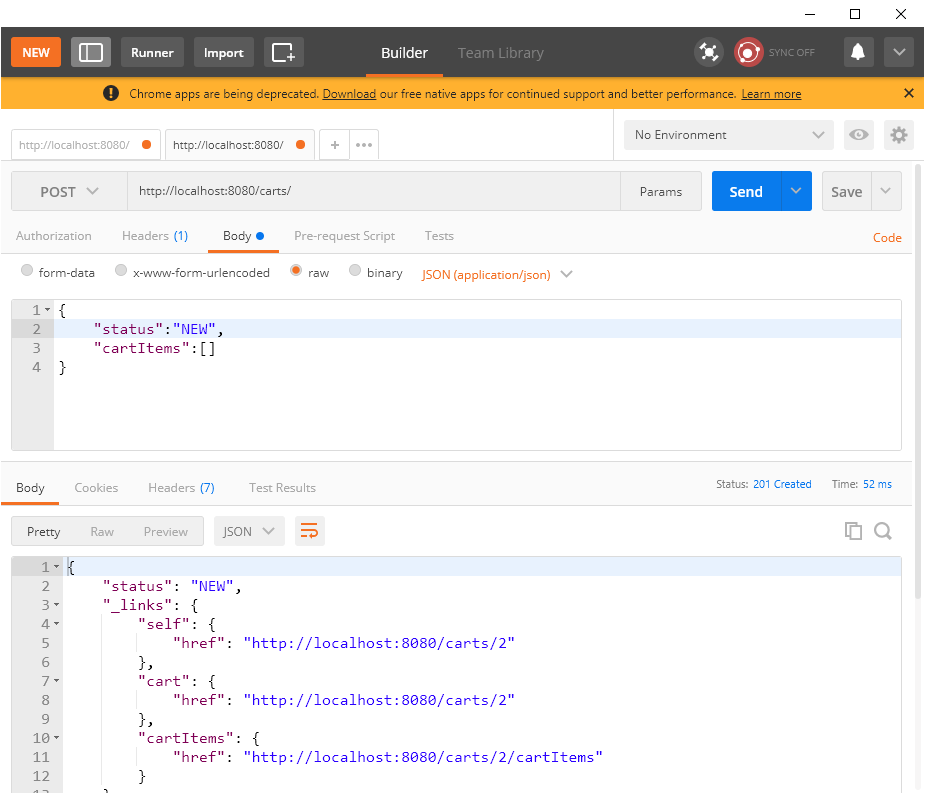
With the above information, it is clear that all repository CRUD operations are exposed over HTTP methods. Let’s try to create a new cart as shown in the screenshot.

Without any code, The server persists the new Cart and even provides an appropriate status code and a response body in the form of hypermedia.
Customizing the repository URLs
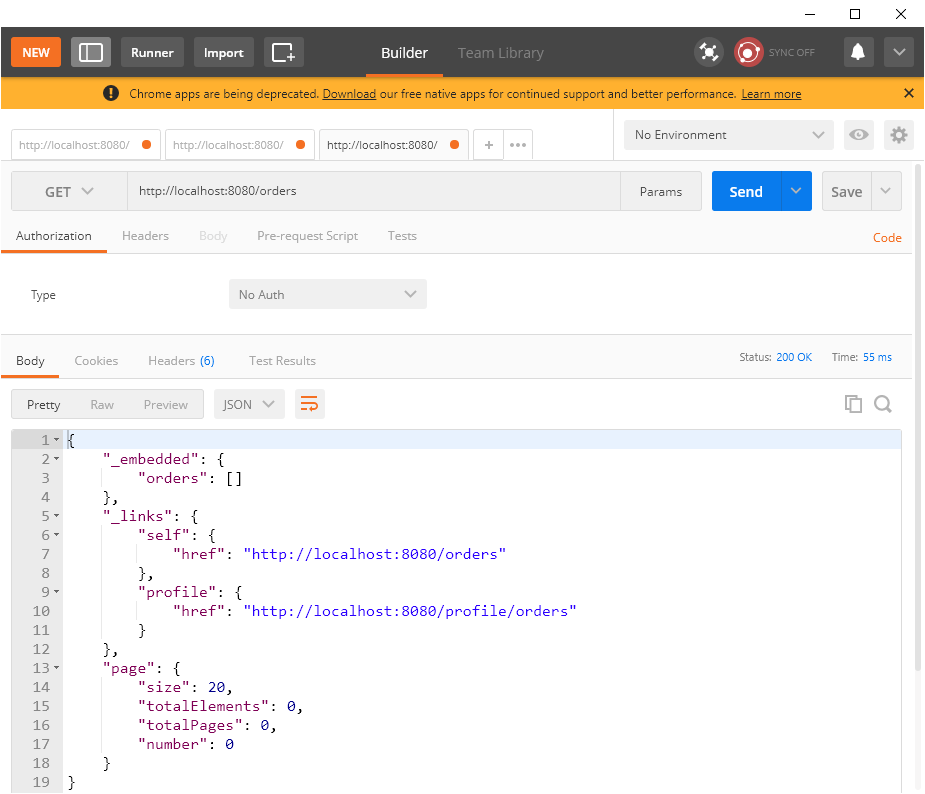
In the profile response above, the order resource is listed as /orderHeaders (named after the entity name). But what if I want this URL to be just /orders. The problem here is that order is a reserved keyword in most of the databases. So I can’t change the entity name to Order. For situations like these, spring-data-rest provides options to rename the endpoint URL.
Just add an @RepositoryRestResource annotation with appropriate values and you are done. Here is an example.
@Repository
@RepositoryRestResource(collectionResourceRel = "orders",itemResourceRel = "order", path = "orders")
public interface OrderRepository extends JpaRepository<OrderHeader, Integer> {

}Code language: PHP (php)
By doing the above, we will map OrderHeader entities under /orders path.

Data JPA repository Configuration
Like all spring boot starters, This starter comes with loads of application properties entries that help deal with out of the box customizations.
Changing the base path
If you want to change the base path of all repository rest to /rest-data-API then you can use the following property.
spring.data.rest.base-path=/rest-data-apiThis way, http://localhost:8080/orders becomes http://localhost:8080/rest-data-api/orders.
When to return a response
A CREATE operation on a RESTful service would return the created object part of the response by default. But for many cases, this object is pretty much what we have sent in the request. Or in some cases, the created object is too large that you want to save the network traffic.
In these cases, you can use the spring.data.rest.return-body-on-create and spring.data.rest.return-body-on-update properties to disable the responses. Setting these properties to false will not produce any content.
spring.data.rest.return-body-on-create=false
spring.data.rest.return-body-on-false=falseCode language: PHP (php)
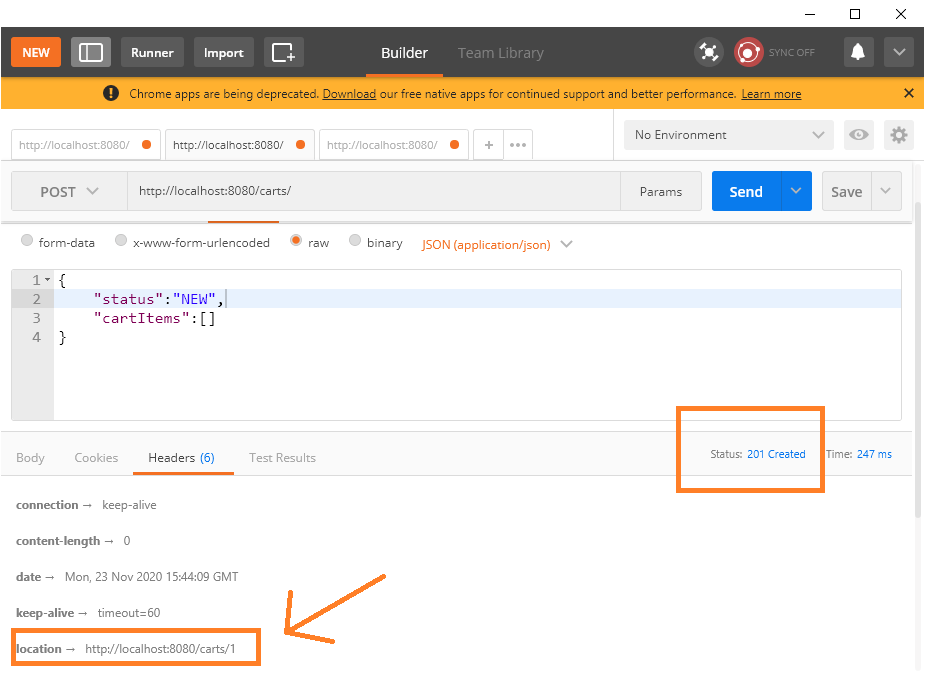
You may wonder how the client will know where the resource was created. Even though the body is ignored when the above properties are set, the Location header in the response carries the created resource’s URL. Clients should use this header to further operate on that resource.

Pagination support in Spring Data Rest
Spring Data rest provides pagination out of the box. Again, You don’t have to write a single line of code for this. Let’s test this out.
If you hit the URL for any collection like /items, /orders or /carts, there is a “page” field that gives information like total records, pages and the current page number.
We can pass these values as query parameters to query a specific chuck out of the total number of records. Here is this behaviour in action. The following URL returns 2nd page from the descending order with three items per page.
$ curl -X GET http://localhost:8080/items?page=1&size=3&sort=id,desc
{
  "_embedded" : {
    "items" : [ {
      "itemName" : "small shirts",
      "price" : 11.42,
      "_links" : {
        "self" : {
          "href" : "http://localhost:8080/items/13"
        },
        "item" : {
          "href" : "http://localhost:8080/items/13"
        }
      }
    }, {
      "itemName" : "small shirts",
      "price" : 11.42,
      "_links" : {
        "self" : {
          "href" : "http://localhost:8080/items/12"
        },
        "item" : {
          "href" : "http://localhost:8080/items/12"
        }
      }
    }, {
      "itemName" : "small shirts",
      "price" : 11.42,
      "_links" : {
        "self" : {
          "href" : "http://localhost:8080/items/11"
        },
        "item" : {
          "href" : "http://localhost:8080/items/11"
        }
      }
    } ]
  },
  "_links" : {
    "first" : {
      "href" : "http://localhost:8080/items?page=0&size=3&sort=id,desc"
    },
    "prev" : {
      "href" : "http://localhost:8080/items?page=0&size=3&sort=id,desc"
    },
    "self" : {
      "href" : "http://localhost:8080/items?page=1&size=3&sort=id,desc"
    },
    "next" : {
      "href" : "http://localhost:8080/items?page=2&size=3&sort=id,desc"
    },
    "last" : {
      "href" : "http://localhost:8080/items?page=5&size=3&sort=id,desc"
    },
    "profile" : {
      "href" : "http://localhost:8080/profile/items"
    }
  },
  "page" : {
    "size" : 3,
    "totalElements" : 16,
    "totalPages" : 6,
    "number" : 1
  }
}Code language: JavaScript (javascript)
The noteworthy thing about this feature is that the _links field provides references to the previous and next pages. Along with that, it provides references to the current, first, and last pages as well.
Summary
To conclude, We learned how to expose JPA endpoints as RESTFul web service endpoints with ease. You can find the example for this tutorial at this GitHub repository.