Redis as Session Store in Spring Boot
In this post, We will take a look at implementing Redis as a Session store in Spring Boot with an example.
When running multiple instances behind a load balancer, maintaining sessions can be a problem. For example, let’s say instance-2 receives a login request and establishes a session for the user. However, the second request may not go to the same server. In this case, the user will see the login screen again. The typical solution would be to use sticky sessions. But, we will still have the problem as we lose the session data on a server crash.
To solve these problems, need to share the session information with the other server instances. Thanks to spring-session module it is as easy as adding a bunch of dependencies, and little configuration. As we saw earlier in the redis cache implementation, Redis can perform better with short lived data. The Spring session module can turn this Redis datastore into a session store.
Adding Redis and spring Session dependencies
First, you need to bring in Redis support via spring-boot-starter-data-redis dependency. To make sure Spring Boot uses Redis as a session store, you need to add spring-session-data-redis as a dependency.
<dependency>
    <groupId>org.springframework.boot</groupId>
    <artifactId>spring-boot-starter-data-redis</artifactId>
</dependency>
<dependency>
    <groupId>org.springframework.session</groupId>
    <artifactId>spring-session-data-redis</artifactId>
</dependency>Code language: HTML, XML (xml)
As you see, there is not a single line of code to be added in spring boot project if you followed the defaults.
Setting up Redis on local
Also, I’m using the following docker-compose.yml to run a Redis server and redis-commander to view the content in Redis.
version: '3'
services:
  redis:
    container_name: redis
    hostname: redis
    image: redis
    ports:
      - "6379:6379"
  redis-commander:
    container_name: redis-commander
    hostname: redis-commander
    image: rediscommander/redis-commander:latest
    restart: always
    environment:
      - REDIS_HOSTS=local:redis:6379
    ports:
      - "8081:8081"Code language: JavaScript (javascript)
after creating docker-compose.yml you can start the server using the following command.
docker-compose docker-compose.yml up -dCode language: CSS (css)Note that this segment is for setting up things in localhost. But you can still run the Redis-commander for viewing the content. All you have to do is to change the Redis host accordingly.
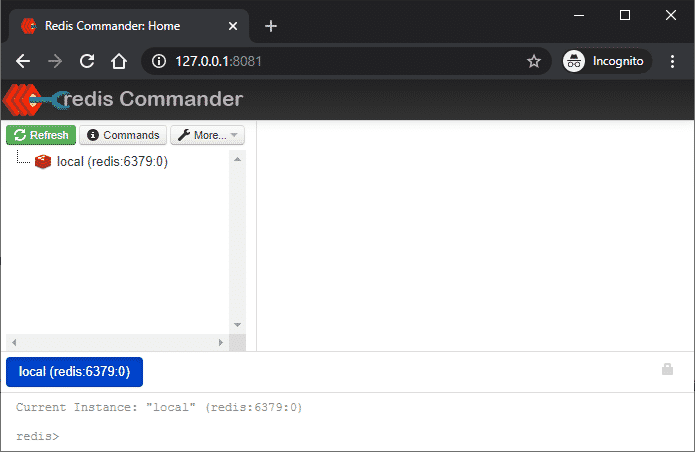
Once the server is up you can navigate to http://localhost:8081/ on the browser to access the RedisCommander GUI.
Setting up application.properties
Once we added the dependencies, the final step is to point the application to the Redis server. For this, you need to add the following properties.
spring.session.store-type=redis
spring.redis.host=localhost
spring.redis.port=6379
Note that
spring.session.store-typecan be ignored as the auto-configuration will detect theredis-starterdependency and configure this value automatically toredis.However, If you have multiple
spring-session-data-*dependencies, then you need to specify a value for this property.
Some Redis servers may have a password for that use spring.redis.password. For more, Redis related properties head down to the spring boot documentation for all application properties.
Final Results
With all the above in place, whenever a new login happens on the server, you can see new session entries in the Redis data store.
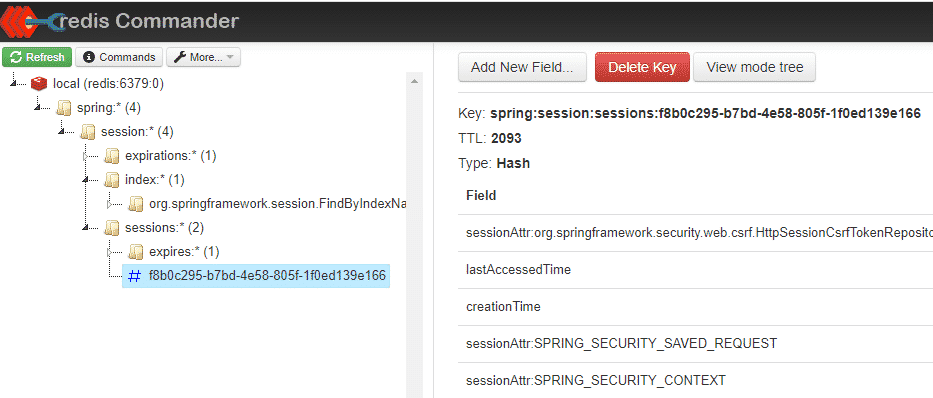
On the right side of the above view, you can see the session attributes usually in gibberish (these are in java serialized objects format).
Whenever the server needs to check the session detail, these data gets created and updated. When another application connects to the same Redis server, that application can start serving authenticated requests as the session details are available for the new server as well.
Also, note that the Redis server keeps the session information even when the application crashes. Thus, the user doesn’t need to log in again on server restarts.
The sample code base for this example is in the Github link below.
In the above screenshot you can see that the default path(namespace) where the sessions are stored is spring:session. You can override this path to be different using spring.session.redis.namespace configuration property.