Thymeleaf Form POST Handling in Spring Boot
In this post, we will take a look how to handle form POST request submission from thymeleaf template in Spring boot and how to bind form elements to a Model object.
Typical Form handling
For applications that use Thymeleaf views, AJAX may be overkill. But form handling is not simple. At least in the context of Spring MVC. One way to handle form submission is to read all request parameters using @RequestParam annotation.
For example, take a look at this form.
You can read the submitted form like this.
@RequestMapping(value = "/", method = RequestMethod.POST)
public ResponseEntity<?> handleForm(@RequestParam("firstName") String firstName,
    @RequestParam("firstName") String lastName, @RequestParam("role")
    Role role) {
  logger.info("first Name : {}", firstName);
  logger.info("Last Name : {}", lastName);
  logger.info("Role: {}", role);
  return ResponseEntity.ok().body(firstName);
}Code language: CSS (css)
As you see, this may seem simple at the beginning. However, Think of a situation where you need to add a new parameter to the form. Now you have to make changes to the VIEW and the controllers. All of this leads to more work for you and your team.
Form handling with Thymeleaf Views
To avoid handling each form fields manually, Thymeleaf and Spring let you bundle all of them together using @ModelAttribute. This support makes form handling with Thymeleaf easy. Let’s see how we can do this.
Create a Form model
First, you need to create a class that resembles the form. We will use this as the Model attribute.
public class UserInfo {
    private String firstName;
    private String lastName;
    private String role;
    //getters and setters
}Code language: PHP (php)
In my example, I have created this class as a JPA
@Entity. This change helps me store the object directly to the database. To be clear, It doesn’t matter if the object is a JPA entity or not. SpringMVC treats them as simple POJOs
Create Thymeleaf template with Form mapping
Easier way to map the form handling to a thymeleaf model would be to use th:object attribute.
<form method="post" th:action="@{/users/}" th:object="${userInfo}">
        <input id="firstName" placeholder="Enter First Name" required type="text" th:field="*{firstName}"/>
        <input id="lastName" placeholder="Enter Last Name" required type="text" th:field="*{lastName}"/>
        <select id="role" required th:field="*{role}">
            <option value="" hidden>Select a role</option>
            <option value="GUEST" hidden>GUEST</option>
            <option value="USER" hidden>USER</option>
            <option value="ADMIN" hidden>ADMIN</option>
        </select>
    </div>
    <input type="submit" value="Create User">
</form>Code language: HTML, XML (xml)
The important things to note here is that the th:object attribute in <form> element and th:field attribute of input elements. These attributes let thymeleaf and spring know how to weave the parameters. Now let’s see how to read these models on the server.
Write @Controller to handle Form POST request from Thymeleaf
In your Spring MVC controller, use the @ModelAttribute annotation to inject the form data. Now you can save this data and show the list of users as I have shown below.
@RequestMapping(value = "/", method = RequestMethod.POST)
public String createUser(@ModelAttribute UserInfo userInfo) {
  logger.info("first Name : {}", firstName);
  logger.info("Last Name : {}", lastName);
  logger.info("Role: {}", role);
  return ResponseEntity.ok().body(firstName);
}Code language: CSS (css)
Working Example
Here is my complete implementation for this demo. In this example, We will use a form to submit user data, and then we save and show the added users on the same page.
Dependencies
For this tutorial, we need to add thymeleaf starter obviously. Along with that, We need to have web starter for Spring-MVC support and jpa starter for storing and retrieving user info in the database.
<dependencies>
    <dependency>
      <groupId>org.springframework.boot</groupId>
      <artifactId>spring-boot-starter-data-jpa</artifactId>
    </dependency>
    <dependency>
      <groupId>org.springframework.boot</groupId>
      <artifactId>spring-boot-starter-thymeleaf</artifactId>
    </dependency>
    <dependency>
      <groupId>org.springframework.boot</groupId>
      <artifactId>spring-boot-starter-web</artifactId>
    </dependency>
    <dependency>
      <groupId>com.h2database</groupId>
      <artifactId>h2</artifactId>
      <scope>runtime</scope>
    </dependency>
</dependencies>Code language: HTML, XML (xml)
I’m also using the h2 in-memory database for JPA.
Data Layer/Model
Here is the data layer. This class will be used for both JPA and for the UI model. But ideally you shouldn’t do it this way on complex database schema.
@Entity
public class UserInfo {
    @Id
    @GeneratedValue(strategy = GenerationType.IDENTITY)
    private Integer id;
    private String firstName;
    private String lastName;
    private Role role;
    private boolean active = true;
    private LocalDateTime createdAt = LocalDateTime.now();
//getters and setters
}Code language: PHP (php)
In the above class, We only refer to firstName, lastName and role in the form. Also, note that the role field is an ENUM. See how I have handled it in the thymeleaf template.
Thymeleaf View layer
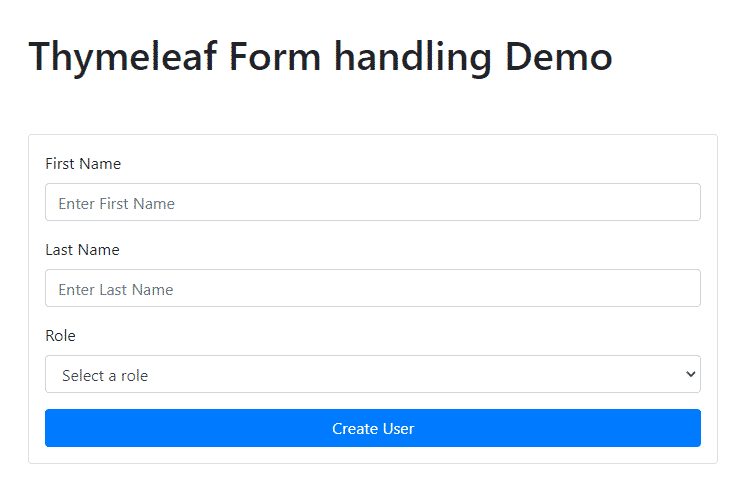
And here is the complete thymeleaf template for form and showing the user details in the same page. I have also used a little bit of CSS using bootstrap to make it look appealing. As you see here, the form elements are bound to a thymeleaf model to handle the post request.
<!doctype html>
<html lang="en" xmlns:th="https://www.thymeleaf.org">
<head>
    <meta charset="UTF-8">
    <meta name="viewport"
          content="width=device-width, user-scalable=no, initial-scale=1.0, maximum-scale=1.0, minimum-scale=1.0">
    <meta http-equiv="X-UA-Compatible" content="ie=edge">
    <title>Thymeleaf Form handling Demo</title>
    <link rel="stylesheet" href="//cdnjs.cloudflare.com/ajax/libs/twitter-bootstrap/4.5.3/css/bootstrap.min.css">
</head>
<body class="container">
<h1 class="py-5">Thymeleaf Form handling Demo</h1>
<form method="post" th:action="@{/users/}" th:object="${userInfo}" class="col card p-3 mb-5">
    <div class="form-group">
        <label for="firstName">First Name</label>
        <input id="firstName" placeholder="Enter First Name" required type="text" th:field="*{firstName}"
               class="form-control"/>
    </div>
    <div class="form-group">
        <label for="lastName">Last Name</label>
        <input id="lastName" placeholder="Enter Last Name" required type="text" th:field="*{lastName}"
               class="form-control"/>
    </div>
    <div class="form-group">
        <label for="role">Role</label>
        <select id="role" required th:field="*{role}" class="form-control ">
            <option value="" hidden>Select a role</option>
            <option th:each="role : ${T(com.springhow.examples.springboot.thymeleaf.domain.entities.Role).values()}"
                    th:value="${role}"
                    th:text="${role}">
            </option>
        </select>
    </div>
    <input type="submit" class="btn btn-primary" value="Create User">
</form>
<table class="table table-striped table-bordered">
    <tr>
        <th>ID</th>
        <th>First Name</th>
        <th>Last Name</th>
        <th>Role</th>
        <th>Created At</th>
    </tr>
    <tr th:if="${#lists.isEmpty(users)}">
        <td colspan="5">No Records found. Add some...!</td>
    </tr>
    <tr th:each="user : ${users}">
        <td th:text="${user.id}"></td>
        <td th:text="${user.firstName}"></td>
        <td th:text="${user.lastName}"></td>
        <td th:text="${user.role}"></td>
        <td th:text="${user.createdAt}"></td>
    </tr>
</table>
</body>
</html>Code language: HTML, XML (xml)
Database and Service Layer
Next, we have to define our repositories and Service methods. Again, You are free to define these classes in whichever way you want. In my case, I created a UserInfoRpository that lists all users. A UserService bean will use this repository to store and retrieve data.
@Service
public class UserService {

    private final UserInfoRepository userInfoRepository;

    public UserService(UserInfoRepository userInfoRepository) {
        this.userInfoRepository = userInfoRepository;
    }

    public List<UserInfo> getUsers() {
        return userInfoRepository.findAll();
    }

    public UserInfo createUser(UserInfo userInfo) {
        return userInfoRepository.save(userInfo);
    }

}Code language: PHP (php)
Controller Layer
I’m using a GET /users/ endpoint to display the form and the current list of users. And a POST /users/ endpoint to handle the form submission.
I made the POST endpoint set to redirect to the GET endpoint after user creation. This redirect makes sure the user sees new data. (You can show a different view if you want to).
@Controller
@RequestMapping("/users")
public class UserController {

  private final UserService userService;

  public UserController(UserService userService) {
    this.userService = userService;
  }

  @RequestMapping(value = "/", method = RequestMethod.GET)
  public String getUsers(Model model) {
    List<UserInfo> users = userService.getUsers();
    model.addAttribute("users", users);
    model.addAttribute("userInfo", new UserInfo());
    return "users";
  }

  @RequestMapping(value = "/", method = RequestMethod.POST)
  public String createUser(Model model, @ModelAttribute UserInfo userInfo) {
    UserInfo user = userService.createUser(userInfo);
    return "redirect:/users/";
  }
}Code language: PHP (php)
Notice the line model.addAttribute("userInfo", new UserInfo()); at the getUsers method. Without this line, you will get an error that says Neither BindingResult nor plain target object for bean name ‘userInfo’ available as request attribute. By adding an empty object, the thymeleaf context can fill in default values. In this case, null.
An alternative approach to this is to add @ModelAttribute UserInfo userInfo to the method parameters. However, this causes the form to retain last submitted values (I want the form to be clean).
Testing Thymeleaf Form Handling
Here is the result of all the work we have done to handle a form submission request with thymeleaf view.
Check out the source code in this GitHub Repository.
Thanks. I Like following things in blogs
effective useful things in easy way.
Students get things/material/stuff with less time and effort.
things clear, precise, no verbose and still descriptive . All important things are written in blog.
Hola, estaba probando su código y realicé la BD pero al momento de ejecutarlo no me reflejaba la plantilla y no entiendo porque. Les agradecería mucho si me puedieran ayudar.
The best way to approach these types of issues is to place a few debug points and see if you actually have data coming from your services. Hope this helps.
Hey, so your code as it is will not work, any end point will yield a 404 error. The way to fix it is where you @RequestMapping(“/users”) in the controller, we need to change it to the root @RequestMapping(“/users”) since we are not handling the /users endpoint.
Thanks a lot for the tutorial!!! it really is a blessing in the skies.
The
@RequestMappingworks, if you specify it at class level, the path is prepended to all method level mappings. So the code does work. If you plan on testing it, Feel free to run it yourself on your local.