@SpringBootApplication annotation – How it works
Every spring boot application has the @SpringBootApplication annotation on its main class. On contrary to popular belief, it is not just there to inform that the application is a spring boot application. Let’s take a deep dive into what this annotation is and how it works with some examples.
Introduction
The @SpringBootApplication annotation is there to configure three things. They are,
- Enabling or disabling Spring Boot auto-configuration. (
@EnableAutoConfiguration) - choosing which packages to scan for components (
@ComponentScan) - Enabling the configuration bean registrations or for importing additional configurations (
@SpringBootConfiguration)
Basically, The @SpringBootApplication is a short way to define @SpringBootConfiguration, @EnableAutoConfiguration, and @ComponentScan together.
For instance, both of these code blocks result in similar behavior.
@SpringBootApplication
public class SampleApplication{
    public static void main(String[] args) {
        SpringApplication.run(SampleApplication.class, args);
    }
}


Code language: Java (java)
@SpringBootConfiguration
@EnableAutoConfiguration
@ComponentScan
public class SampleApplication{
public static void main(String[] args) {
SpringApplication.run(SampleApplication.class, args);
}
}Code language: Java (java)If you run both of these applications, they will also behave the same.
How to use @SpringBootApplication annotation?
In most cases, you will leave this annotation as it is. It comes with certain default values that work for most developers out of the box. But if you want, you can override some of the behaviors we talked about earlier. For this, the annotation exposes a set of fields. Some of the important ones are,
exclude– To exclude specific auto-configuration classes.scanBasePackages– A list of base packages to scan for spring components and beansproxyBeanMethods– Whether to proxy @Bean methods.
Next, let’s check some of the examples of how to configure these.
Excluding auto-configurations
If you want some auto configurations to be ignored, then you should use the exclude attribute. For example, take a look at the below snippet.
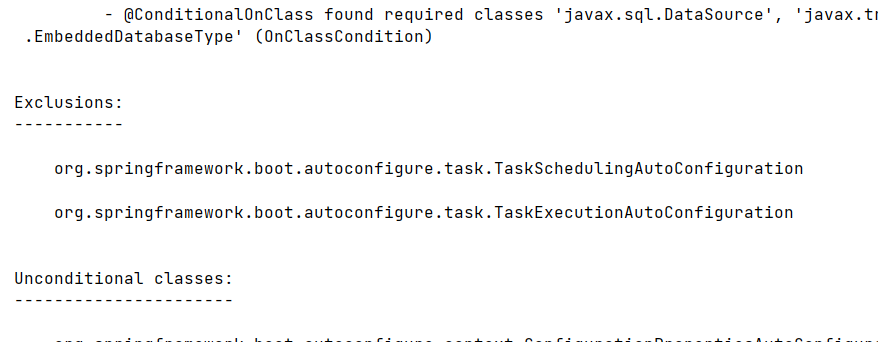
@SpringBootApplication(exclude = {TaskSchedulingAutoConfiguration.class, TaskExecutionAutoConfiguration.class})
Code language: Java (java)
This snippet makes sure not to configure task scheduling and ThreadPools for async tasks. S0, this option is really helpful to remove unwanted auto-configuration from the application startup. This means that the application will start faster.
You can even see the exclusions when you troubleshoot the auto-configurations.
Changing where to locate components
By default, spring-boot looks for components in the sub-packages of where the main class resides. But you can override this and even include additional places to scan. So let’s see how to implement that.
@SpringBootApplication(scanBasePackages = {
        "com.springhow.examples.autoconfig",
        "com.springhow.examples.components",
        "com.thirdparty.components"})Code language: Java (java)
As you see here, we can load configurations and components from different packages.
This option is helpful when you only want to load a selected set of components into your application context. Also, it helps you load third-party components which are not possible with the default approach.
If you choose not to scan base packages, then you can always replace the @SpringBootApplication with the individual annotations. For instance, the below snippet will only load specific configuration classes. Also, this means you don’t get any support for @ConfigurationProperties.
@SpringBootConfiguration
@EnableAutoConfiguration
@Import({ MyConfiguration.class, MyOtherConfiguration.class })
public class MyApplication {

    public static void main(String[] args) {
        SpringApplication.run(MyApplication.class, args);
    }

}Code language: Java (java)
Summary
So far, we have learned what the @SpringBootApplication annotation is about and how we can use them properly. The following topics are related to this article. Feel free to give them a read.