Whitelabel Error Page in Spring Boot | Complete Guide
Let’s learn about the Whitelabel error page in Spring Boot and how to customize or disable them. White label error pages are default behavior from Spring Boot. Like any other feature, We can customize this feature to great extent.
What are Whitelabel error pages in Spring Boot?
Depending on API client request or browser request, spring boot provides an error JSON response or a full HTML error page. For example, let’s create a simple /hello endpoint that throws an exception always.
@RequestMapping("/hello")
String hello() {
    throw new IntrovertException("Don't bother me please..!");
}Code language: Java (java)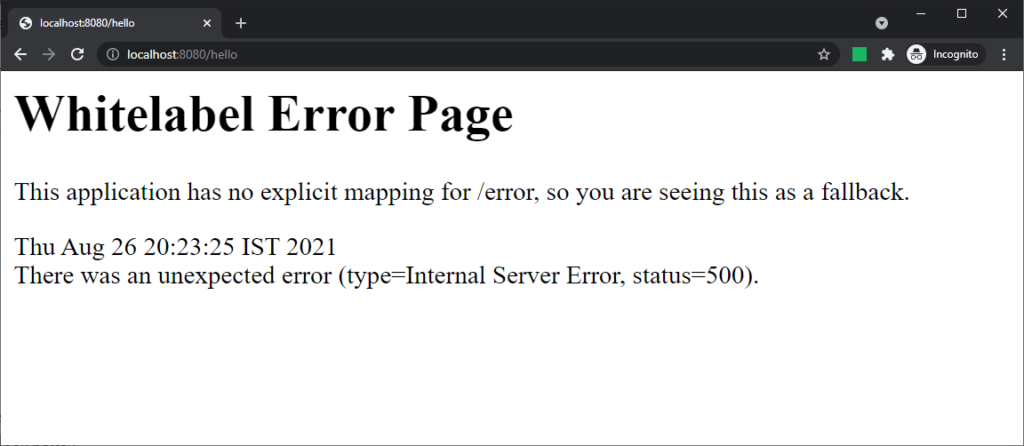
Even though this page looks simple, you can add details to it using the following configuration.
server.error.include-message=always
server.error.include-exception=true
server.error.include-stacktrace=always
server.error.include-binding-errors=alwaysCode language: Properties (properties)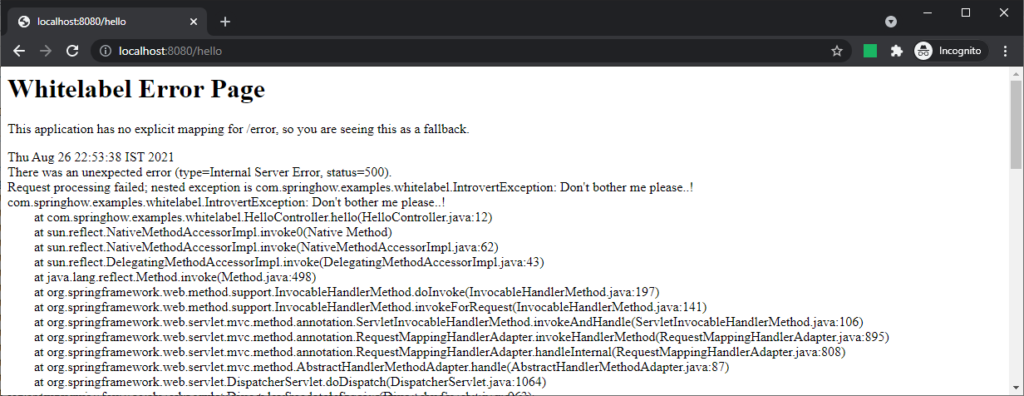
Even though the messages are helpful, this page may not fit well with your other page designs. So if you want to override this page with your own design, you are in luck.
Overriding Whitelabel Error Pages
Spring boot provides a /error mapping at a global servlet container level. This mapping handles requests and sends back JSON or HTML view as a response with error codes/messages. But the view that we saw above looks default. If you notice the first line of the error page, it says “This application has no explicit mapping for /error, so you are seeing this as a fallback.”
Here, the spring boot is trying to hint to you that you need to provide your own template to handle these error requests. So let’s see how to do that.
As we know, The handler mapped for /error expects a view to show the HTML response. If it doesn’t find a view matching “error” it will use the placeholder we have seen above. So we first need to add a template called error.html. But the template alone will not work. You also need to add one of the spring boot supported template engines. In our case, we are adding thymeleaf.
<dependency>
    <groupId>org.springframework.boot</groupId>
    <artifactId>spring-boot-starter-thymeleaf</artifactId>
</dependency>Code language: HTML, XML (xml)
Next, you need to add the error.html template into your src/main/resources/templates directory.
With the above in place, the following MVC attributes will be available for you to access in the templates.
- message – Return value of exception.getMessage()
- exception – A string that contains the canonical exception name.
- trace – The complete stacktrace of the exception that caused this error.
- errors – A list of validation failures that occured during the request.
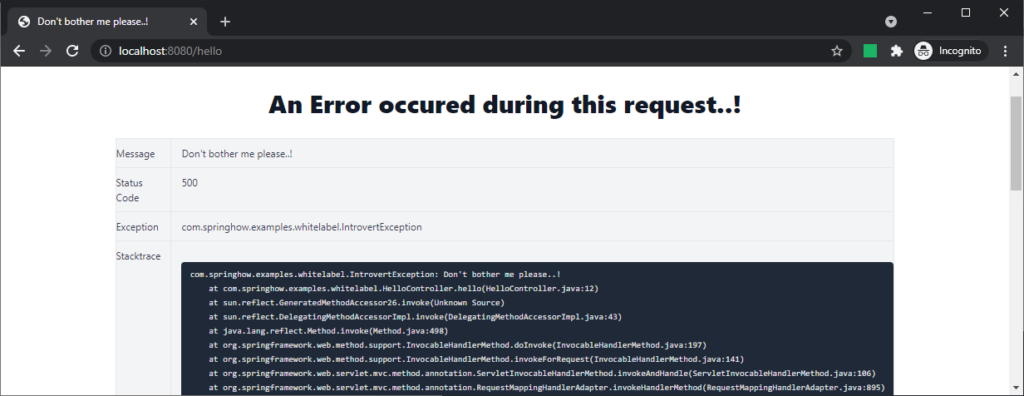
Along with these, there is also a status attribute that gives the HTTP status code for the error response. With that in place, we can rewrite our template file to show all these attributes.
<!doctype html>
<html lang="en">
<head>
    <title th:text="${message}"></title>
</head>
<body>
<table border="1">
    <tr><td>Error Message</td><td th:text="${message}"></td></tr>
    <tr><td>Status Code</td><td th:text="${status}"></td></tr>
    <tr><td>Exception</td><td th:text="${exception}"></td></tr>
    <tr><td>Stacktrace</td><td><pre th:text="${trace}"></pre></td></tr>
    <tr><td>Binding Errors</td><td th:text="${errors}"></td></tr>
</table>
</body>
</html>Code language: HTML, XML (xml)
This simple template will yield the following error page when we access /hello.

With a little bit of CSS, we can get this page to look better and more appealing.
Disabling Whitelabel error page altogether /Tomcat whitelabel
Spring boot also provides a way to disable the Whitelabel error page altogether using server.error.whitelabel.enabled setting. When set to false, the server will show an error page specific to the servlet container(tomcat). For example, the below error page from tomcat will be visible if the Whitelabel is disabled and no error template is available.
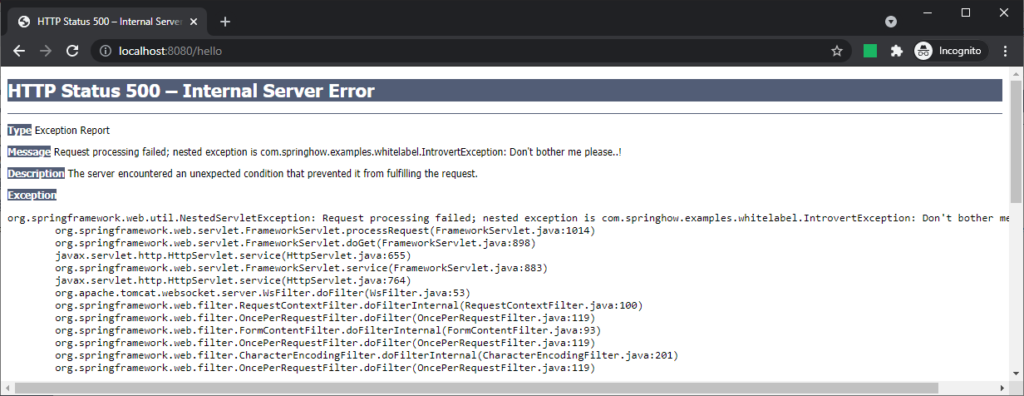
You can swap tomcat with jetty and you will still see an error page like this offered by the jetty runtime. And undertow currently doesn’t provide a view. But it does send response codes.
Important things to note
Always use a custom error.html page for the following reasons.
- Default whitelabel page lets hackers know you are using spring boot. This means they only need to try the exploits for spring boot.
- Never show exceptions in your production servers. Exceptions are great info for hackers.
- A custom error page with proper CSS will blend in to your other pages. You can even provide links and search boxes that can redirect users back to your site.
You can hide specific error attributes based on the configuration we saw earlier. Also, all these configurations are also applicable for the JSON response as well. If your request contains Accept: application/json header, then the response will be in the form of JSON. Even here, you can access all these attributes. For example, take a look at the below request.
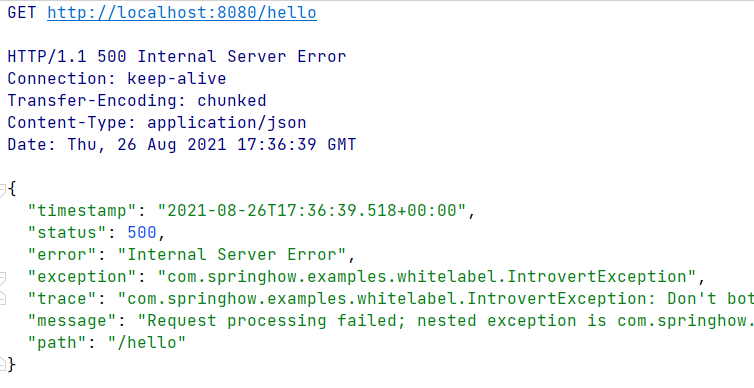
Here you can see the trace, exception, and message attributes being available as JSON.
Summary
To sum it up, we learned about white label error pages and how to customize them. We found out how to override the default Whitelabel with our own error.html. You can check out all these examples at our GitHub Repository.